Posts

Showing posts from April, 2017

A Great New Service Just For You

As some of you may know running a blog and other side projects can be a little expensive so to help fund all this I decided to start a service that is not only fun for me but all so gives you something great. That service is offering you a custom made computer build for exactly what you want. The way it works is simple, fill out the form below or follow this link . Provide me with some contact information and some basic info about your new computer and I will contact you about some of the finer details. That's it your part is done and my work starts.  I will then order the parts, build the computer and set it up and install software if you would like. After that I will ship it out to you in your preferred method. Loading...
Tool Box - Version 2.1.1.3

Image
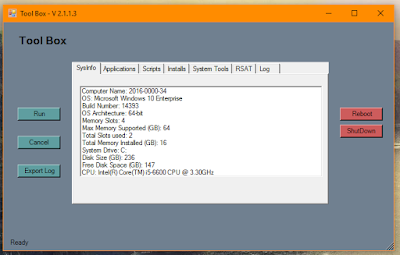
I have updated my Tool Box Script with a few visual changes and a new tab for RSAT Tools Changes: 1. Added some color to the main window 2. Added a Shutdown and Restart button to the Main window 3. Added a Tab for RSAT tools, The tab will only show if RSAT tools are installed on the computer you are running the Tool Box from. Download from HERE <# .SYNOPSIS A script to log and run Applications, Scripts and Tools. .DESCRIPTION The script will allow you to run multipul Applications, Scripts and Tools. While using the script a log will be created of everything you have used so that you can keep track of all of your steps. You can also add your own Tools to the script, you can see how to do that in the Examples Below. .EXAMPLE To add an Application first you need to add the name of the exicutable to the Applications.ini file located in the Applications folder, Take note that you do include the file extention. Second add your Application and all resorces needed for it to run to th

Tool Box Change Log

You can find all changes listed over the revisions of my Tool Box Script Download from HERE Version number increments: EX : 1.0.0.1 1st number increment - Full revision will probably contain visual function and code organization changes 2nd number increment - Added features to the script 3rd number increment - Visual changes to the script 4th number increment - Code or folder structure changes 4/25/17 - Version 2.1.1.3 1. Added color to the main window and buttons 2. Created a tab for RSAT Tools (You will only see the tab if you have the tools installed on the computer) 3. Added Shutdown and Reboot Buttons to the main window 4. Added some code to the script to lay foundation for a export software button.

Script - Get-SCCMDeviceInfo

Image
This tool works much like my Add Computer to SCCM Collection Script but gathers select information about a device from SCCM <# .SYNOPSIS The script will allow you to gather inforamtion about a device from SCCM .DESCRIPTION This script will gather Activation status, Resorce ID, OS, Managment Point,Primary User, Last log in time, Hardware scan,Software scan and Policy request time. .EXAMPLE If you do not want to use the Site form specify yoru site code and site server in the paramiters .\Get-SCCMDeviceDeviceInfo.ps1 -SiteServer SCCMSiteServer -SiteCode CC1 .EXAMPLE if you want to load the PowerShell Module from the local install path use .\Get-SCCMDeviceInfo.ps1 -LoadLocal True .NOTES Created By: Kris Gross Contact: KrisGross@JackofAllTech.org Twitter:@kmgamd .LINK http://sccmtst.com #> Param( $SiteServer, $SiteCode, $LoadLocal ) #Generates the site info form function Generate-SITEform { Add-Type -AssemblyName System.Windows.Forms Add-Type -Assembl

ISO to USB V2.1

Image
There are a lot of ISO burning tools out there and some work but some have issues with specific ISO files so I decided to make my own using powershell. To use it you simply browse to your ISO file then type in the driver letter you want the ISO to be burnt to. If you dint want to mess with the PwoerShell code you can get an exe version of the tool from HERE <# .SYNOPSIS Script to create a bootable flashdrive from a ISO .DESCRIPTION The script will launch a GUI. From the interafece you will be shown all of the drive on your computer first you .NOTES Created By: Kris Gross Contact: KrisGross@sccmtst.com Twitter: @kmgamd .LINK http://sccmtst.com #> #Gets the volume info Function Get-Vol { Get-Volume | Select-Object -Property DriveLetter, FileSystem, Drivetype | Where-Object { $_ .DriveLetter -ne $Null } } #Runs the Burn process Function Run-BurnISO { #Sets ISO file and disk letter $iso = $textbox1 .Text $disk = $textBox3 .T

Script - Get-SoftwareInfo

There will be times that you will only have the option to use a exe and not a MSI to build an application. Normally that's not a problem but then halfway through building the application you realizes you have no idea what to use for a detection method since when you use a MSI SCCM will import that information for you. That is where this script is very handy for a SCCM admin what I do is install the software manually then run this script to get the Software ID number since that is one of the cleanest ways for SCCM to detect an application. <# .SYNOPSIS Script to show or export installed software information .DESCRIPTION The script will display Software ID number, Name, Vendor and Version. .PARAMETER Computer With this parameter you cam run this on a remote computer .PARAMETER Export Allows you to export the information to a file .EXAMPLE .\Get-SoftwareInfo.ps1 -Export SoftwareInfo.txt .EXAMPLE .\Get-SoftwareIn

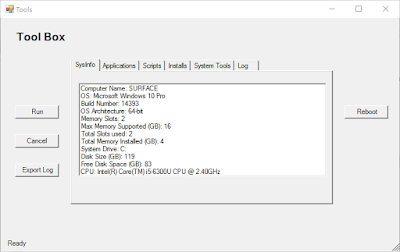
Tool Box - Version 2.0.0.2

Image
Some time a go I had put together a series of bat files that where designed to launch and log different tools and scripts that you may have to help you work on a PC but it wasn't very customisable and it was very large, This is my current revision of that tool using PowerShell and a singe bat file to run it. I will update this as I add more to it. Download full Application from HERE Tool Box - V 2.0.0.1 <# .SYNOPSIS A script to log and run Applications, Scripts and Tools. .DESCRIPTION The script will allow you to run multipul Applications, Scripts and Tools. While using the script a log will be created of everything you have used so that you can keep track of all of your steps. You can also add your own Tools to the script, you can see how to do that in the Examples Below. .EXAMPLE To add an Application first you need to add the name of the exicutable to the Applications.ini file located in the Applications folder, Take note that you do include the file extention. Second